Service Plan Settings
What each service plan setting controls, where it lives in Rotor, and the order to set them up in.
Written By Support Team
Last updated About 3 hours ago
A service plan is assembled from settings you configure once. Get them right and selling a plan is four clicks and a signature; get them wrong and every signup turns into a workaround. This article covers what each setting controls, where it lives, and the order to set them up in.
If you are looking for how to sell a plan rather than configure one, see Service Plans. For how a plan gets billed on a repeating schedule, see Billing Cycles.
Where Each Setting Lives
Service plan configuration is spread across a few settings pages. This table is the map.
Service Types
A service type is the category of work a plan covers — Window Cleaning, Pressure Washing, Pest Control. It does two jobs at once: it labels the plan, and it filters the price book so that building a window cleaning plan only shows you window cleaning line items.
Manage them under Settings → Customization.
A plan can carry one service type. If you sell combined offerings, create a service type called Bundled rather than trying to attach two.
Service types are also what a lead is tagged with when they express interest, so keep the list to the categories you actually sell — a long list slows down every signup.
Service Frequencies
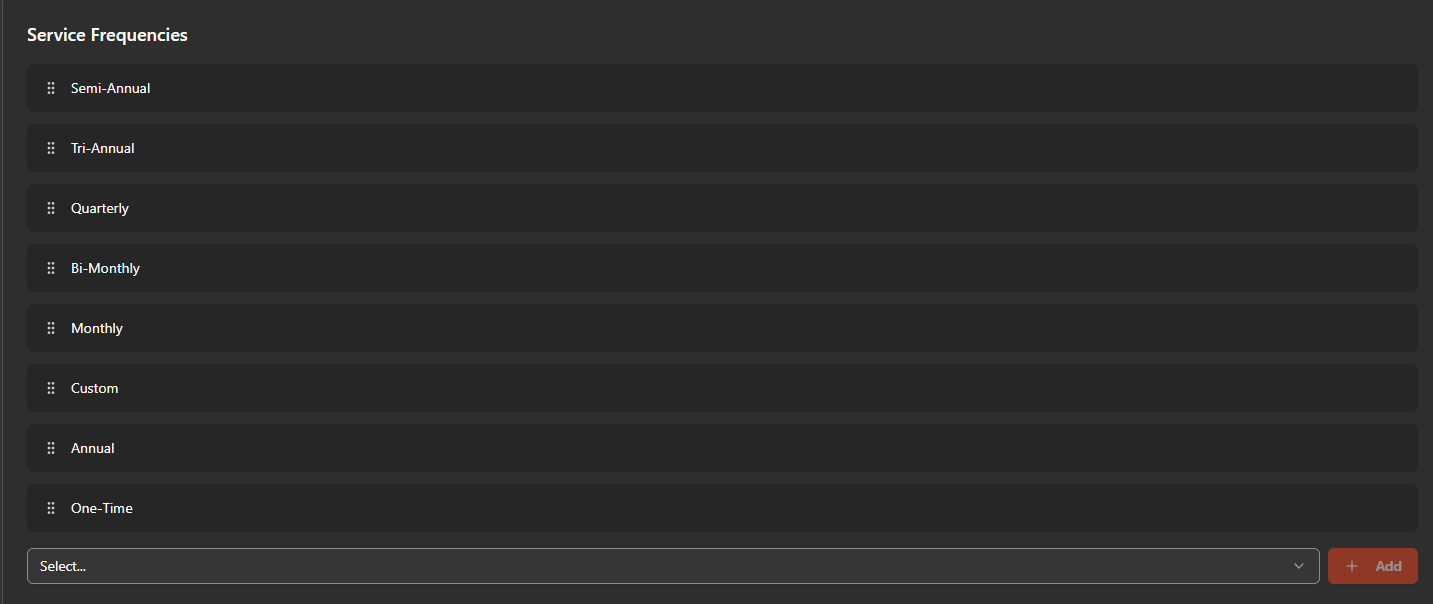
Frequencies control how often a plan repeats, and Rotor uses the frequency plus the plan duration to calculate how many jobs to generate.
Manage them under Settings → Service Plans.
Remove frequencies you do not offer — they clutter the signup form and invite mistakes.
Removing one is not destructive. You can restore it later when your capacity changes.
One-Time runs once; Annual repeats once a year. The auto-renew toggle only appears once you pick something other than One-Time.
Duration and the 13-month option
Plan durations run up to 36 months. The one that confuses people is 13 months: on a quarterly plan servicing March, June, September and December, choosing 13 months adds one more service the following March. It exists so a plan can land back on the same seasonal month it started on.
Price Book Line Items
Line items are the priced work you attach to a plan. They live under Settings → Price Book and are grouped into folders by service type, which is what keeps the dropdowns short when a rep is standing on a doorstep.
Flat rate or unit price. A line item can be a fixed price per visit ($250 exterior clean) or priced per unit ($5 per pane, quantity entered at signup).
Measurement fields are audit fields. They do not drive price — they let a manager check that a $299 job really was 20 panes.
Apply to All Jobs decides whether an item hits every job on the plan or only specific ones. This is how you charge more for a heavier first clean, or include screen cleaning on the initial visit only.
To reuse an item across services use Add to another service; Move takes it out of the current one. Copy before editing if you want to keep the original intact.
Discounts
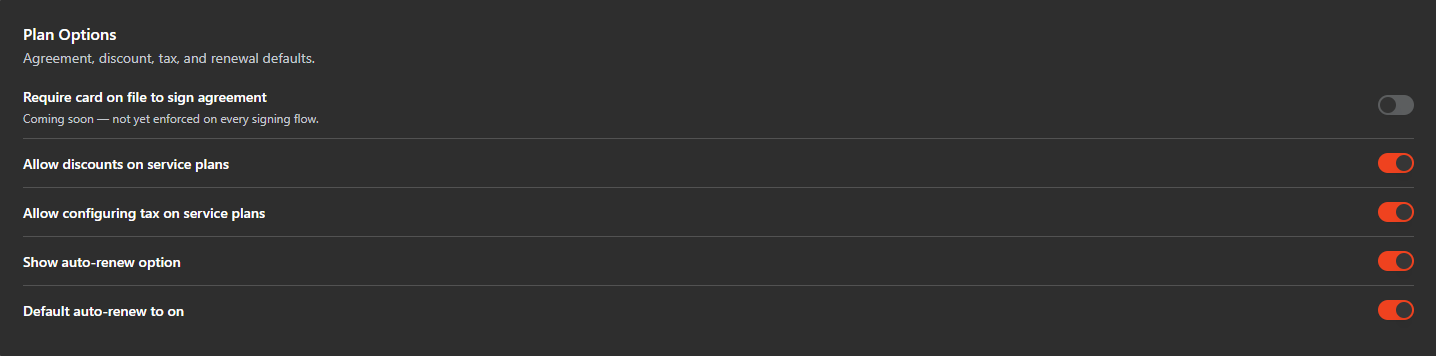
Discounts behave like line items in reverse. They can be a dollar amount or a percentage, and they can apply to the initial job only or to specific visits — which is what makes a "first clean half price" offer possible without discounting the whole contract.
Plan Templates
A plan template is a pre-built service plan. Instead of assembling service type, duration, line items, discount and billing by hand on every signup, your team picks a template and the form fills itself.
Build them under Settings → Price Book → Plan Templates. A template holds:
A name — use the frequency, so Quarterly and Weekly rather than "Plan A"
Service type and plan duration
Auto-renew on or off
Line items and any discount, including whether the discount hits the first job only
Payment behavior such as auto-pay
Order matters. The template at the top of the list is the default that auto-fills when someone clicks New Plan. Put your most-sold plan first — it is the single highest-leverage setting on this page, because it is the one your reps will accept without thinking.
Agreement Templates
If service plans are enabled on your account, the plan builder has three steps — Service, Agreement, Schedule. Without the feature you get Service and Schedule only, because agreements are part of the service plan feature.
At least one agreement template must exist before you can generate a contract at signup. Generating one pulls in the customer's information, your business information, and the full breakdown of services and pricing automatically. It can then be signed in person on a phone, or sent as a link by text or email.
Once signed, the agreement lands in the customer's Attachments with its related links.
Billing defaults
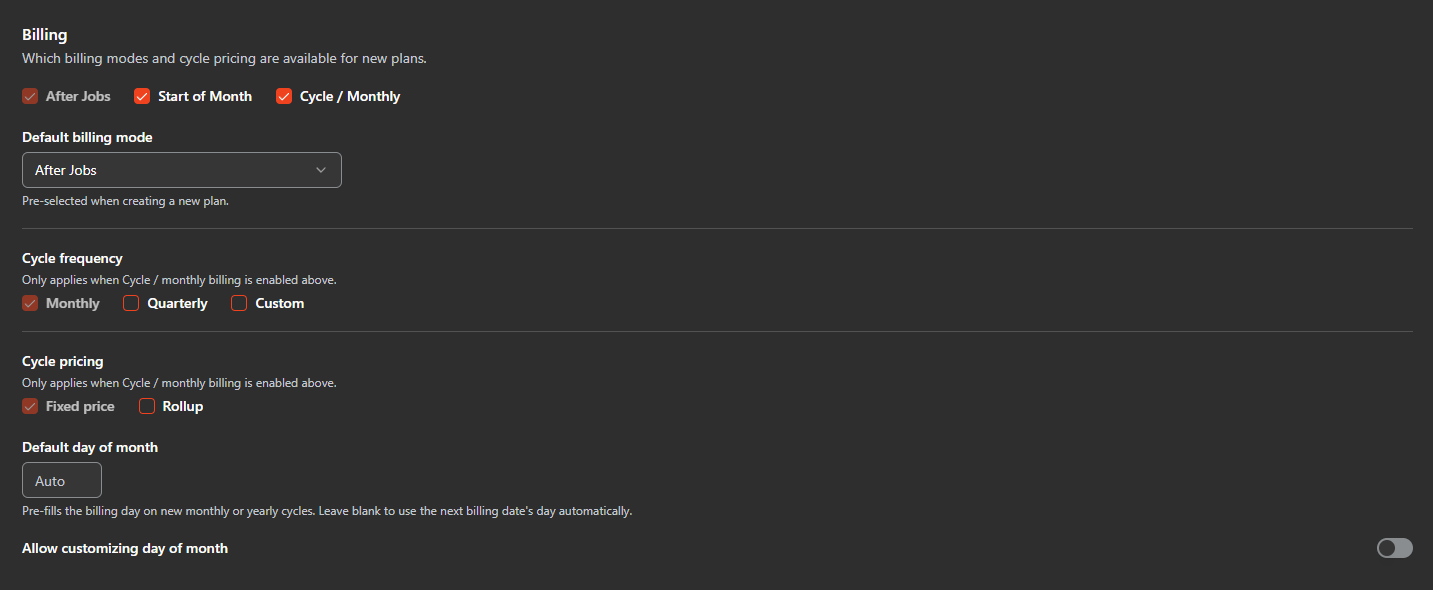
Billing is chosen on each plan. Settings → Service Plans controls which billing modes are available and which one is pre-selected, and the option you pick most often should also be baked into your plan templates. There are three:
Picking Cycle / Monthly opens the cycle settings underneath, where you set frequency, next billing date, and whether the cycle charges a Fixed amount or Rolls up everything outstanding. That is a topic of its own — see Billing Cycles.
Whichever you choose, the plan's outlined service schedule shows which months carry actual service and which are billing-only, so you can sanity-check it before the customer signs.
How jobs get created
The last step of a plan decides whether the work hits the calendar now or waits.
Add jobs to pending queue when due — Rotor knows service is due but does not place it on the schedule. You route it later from Service Jobs → Pending Jobs. This is the right default for most companies, because crews, trucks and routes change over a 12-month plan.
Create jobs now — every job goes straight onto the calendar with a start time, duration and recurring pattern. Use Set up recurring schedule to pin it to something like the 3rd Tuesday of the month.

If Routes are enabled, Rotor will not create jobs automatically regardless of this setting — everything goes to the pending list for routing.
Settings → Service Plans also sets the scheduling options available on a new plan, the months recurring visits skip by default, and default notes for new plans.


Set up in this order
These settings depend on each other, so the order saves rework:
Service types — nothing else can be filtered until these exist.
Service frequencies — trim to what you actually sell.
Price book line items — they attach to service types, so those come first.
Agreement template — at least one, before you try to sell a plan.
Plan templates — built from all of the above, so these come last.
Order the templates — put the most-sold one at the top.
Tips
Some plan features are gated by your Rotor plan. If a setting described here is missing, it may not be included on your account — contact us and we will tell you.
The first plan template in the list is the default. Reordering it is the fastest way to change what your whole sales team sells.
Removing a service frequency does not affect plans already running on it.
Turn off features you do not use under Customization. A shorter form is a faster signup and fewer mistakes at the door.
Anything a technician adds on a job is an upsell and sits outside the plan's pricing — it is billed separately no matter which billing mode the plan uses.
Congratulations! You can now configure your service plan settings in Rotor.
Have additional questions? Our team is ready to help you succeed. Contact us through the chat or drop us an email at support@getrotor.com.
Related articles
Service Plans — how to sell a plan once it is configured
Billing Cycles — how a plan bills on a repeating schedule
Plan Templates — building and ordering pre-built plans
Agreements — agreement templates and signing
Was this helpful?
Still need help? Ask the team