Option Quoting
Build and send quotes on web or mobile with up to four options and optional add-ons, then convert the accepted option into a service plan.
Written By Sean MacCourtney
Last updated 22 days ago
Quotes let you send professional proposals to leads and customers by text or email, then convert the accepted quote straight into a service plan. You can put up to four options on one quote (like Basic, Standard, and Premium) and mark line items as optional so the customer can keep or remove add-ons before they accept.
This article covers quoting on both the web app and the mobile app. The mobile steps are in Quoting on the Mobile App below.
Accessing Quotes
Go to Service → Quotes to view, create, and manage all your quotes in one place. You can also create a quote directly from a lead or customer page.
Building a Quote
Click Create Quote. Every quote starts with Option A.
Pick the contact in the right panel (search, or create a new + Customer / + Lead), and confirm the Salesperson. The salesperson is credited with the sale when the quote converts.
Name the option. Replace "Option A" with something the customer will understand, like "Basic".
Add line items with + Item. Search your Price Book or choose Custom item. Click an item to edit its name, description, qty, price, or add a photo.
Add option photos (optional). These attach to the option itself, separate from line item photos. Use them to show the whole job, like a before photo or a mockup of the finished work.
Add discounts if needed. You can name each discount (like "Fall Promotion") and stack more than one.
Set Plan & billing for this option: plan template, frequency, service types, tax rate, and deposit. Recurring frequencies also show Service length and Billing (After job, Start of Month, or Cycle).
Add notes for this option: Notes for the client show on the quote they receive. Internal notes are only visible to your team. Notes are per option, so each option can have its own.
Choose whether this option advances to agreement. If on, a customer who accepts this option goes straight to signing the service plan agreement. Set it per option, for example on for a recurring plan and off for a one-time job.
Click + Add option to add the next option (up to 4) and repeat.
Use the ⋯ menu next to an option name to Duplicate option (fastest way to build a similar tier) or Delete option. Only need one price? Just build Option A and send.
What's per option vs. shared
So you can quote a one-time cleaning in Option A and a quarterly plan in Option B on the same quote.
Deposits
Set a percentage or fixed deposit on any option and the customer pays it when they accept. Stripe must be connected, or the Deposit control stays hidden. See Collect a Deposit on a Quote.
Recommended Option
Click Mark recommended on the option you want to push. It gets a Recommended badge in the builder and in the customer's view, and it's pre-selected when the customer opens the quote.
If no option is recommended, the portal doesn't select any option by default. The customer picks one before they can accept.
Optional Items
Open any line item and turn on Optional for client. The item gets an Optional tag.
Optional items start checked (included) for the customer.
The customer can uncheck them, and the option price, discounts, tax, and total update instantly.
Anything the customer unchecks is left off when the quote converts.
Good for add-ons like screen cleaning, solar panels, or gutter guards.
Sending
Click Save draft anytime, or Review & send when ready. The review screen shows:
Each option with its frequency, item count, and total
Text message and Email toggles, plus Additional email recipients
Preview and Copy link
At least one delivery method (text, email, or an extra email recipient) is required to send. Use Preview as client in the builder to see exactly what the customer gets.
Quote links open in your branded Client Portal. Automatic quote follow-up reminders are set in Settings → Messaging (see Client Messaging Settings).
What the Customer Sees
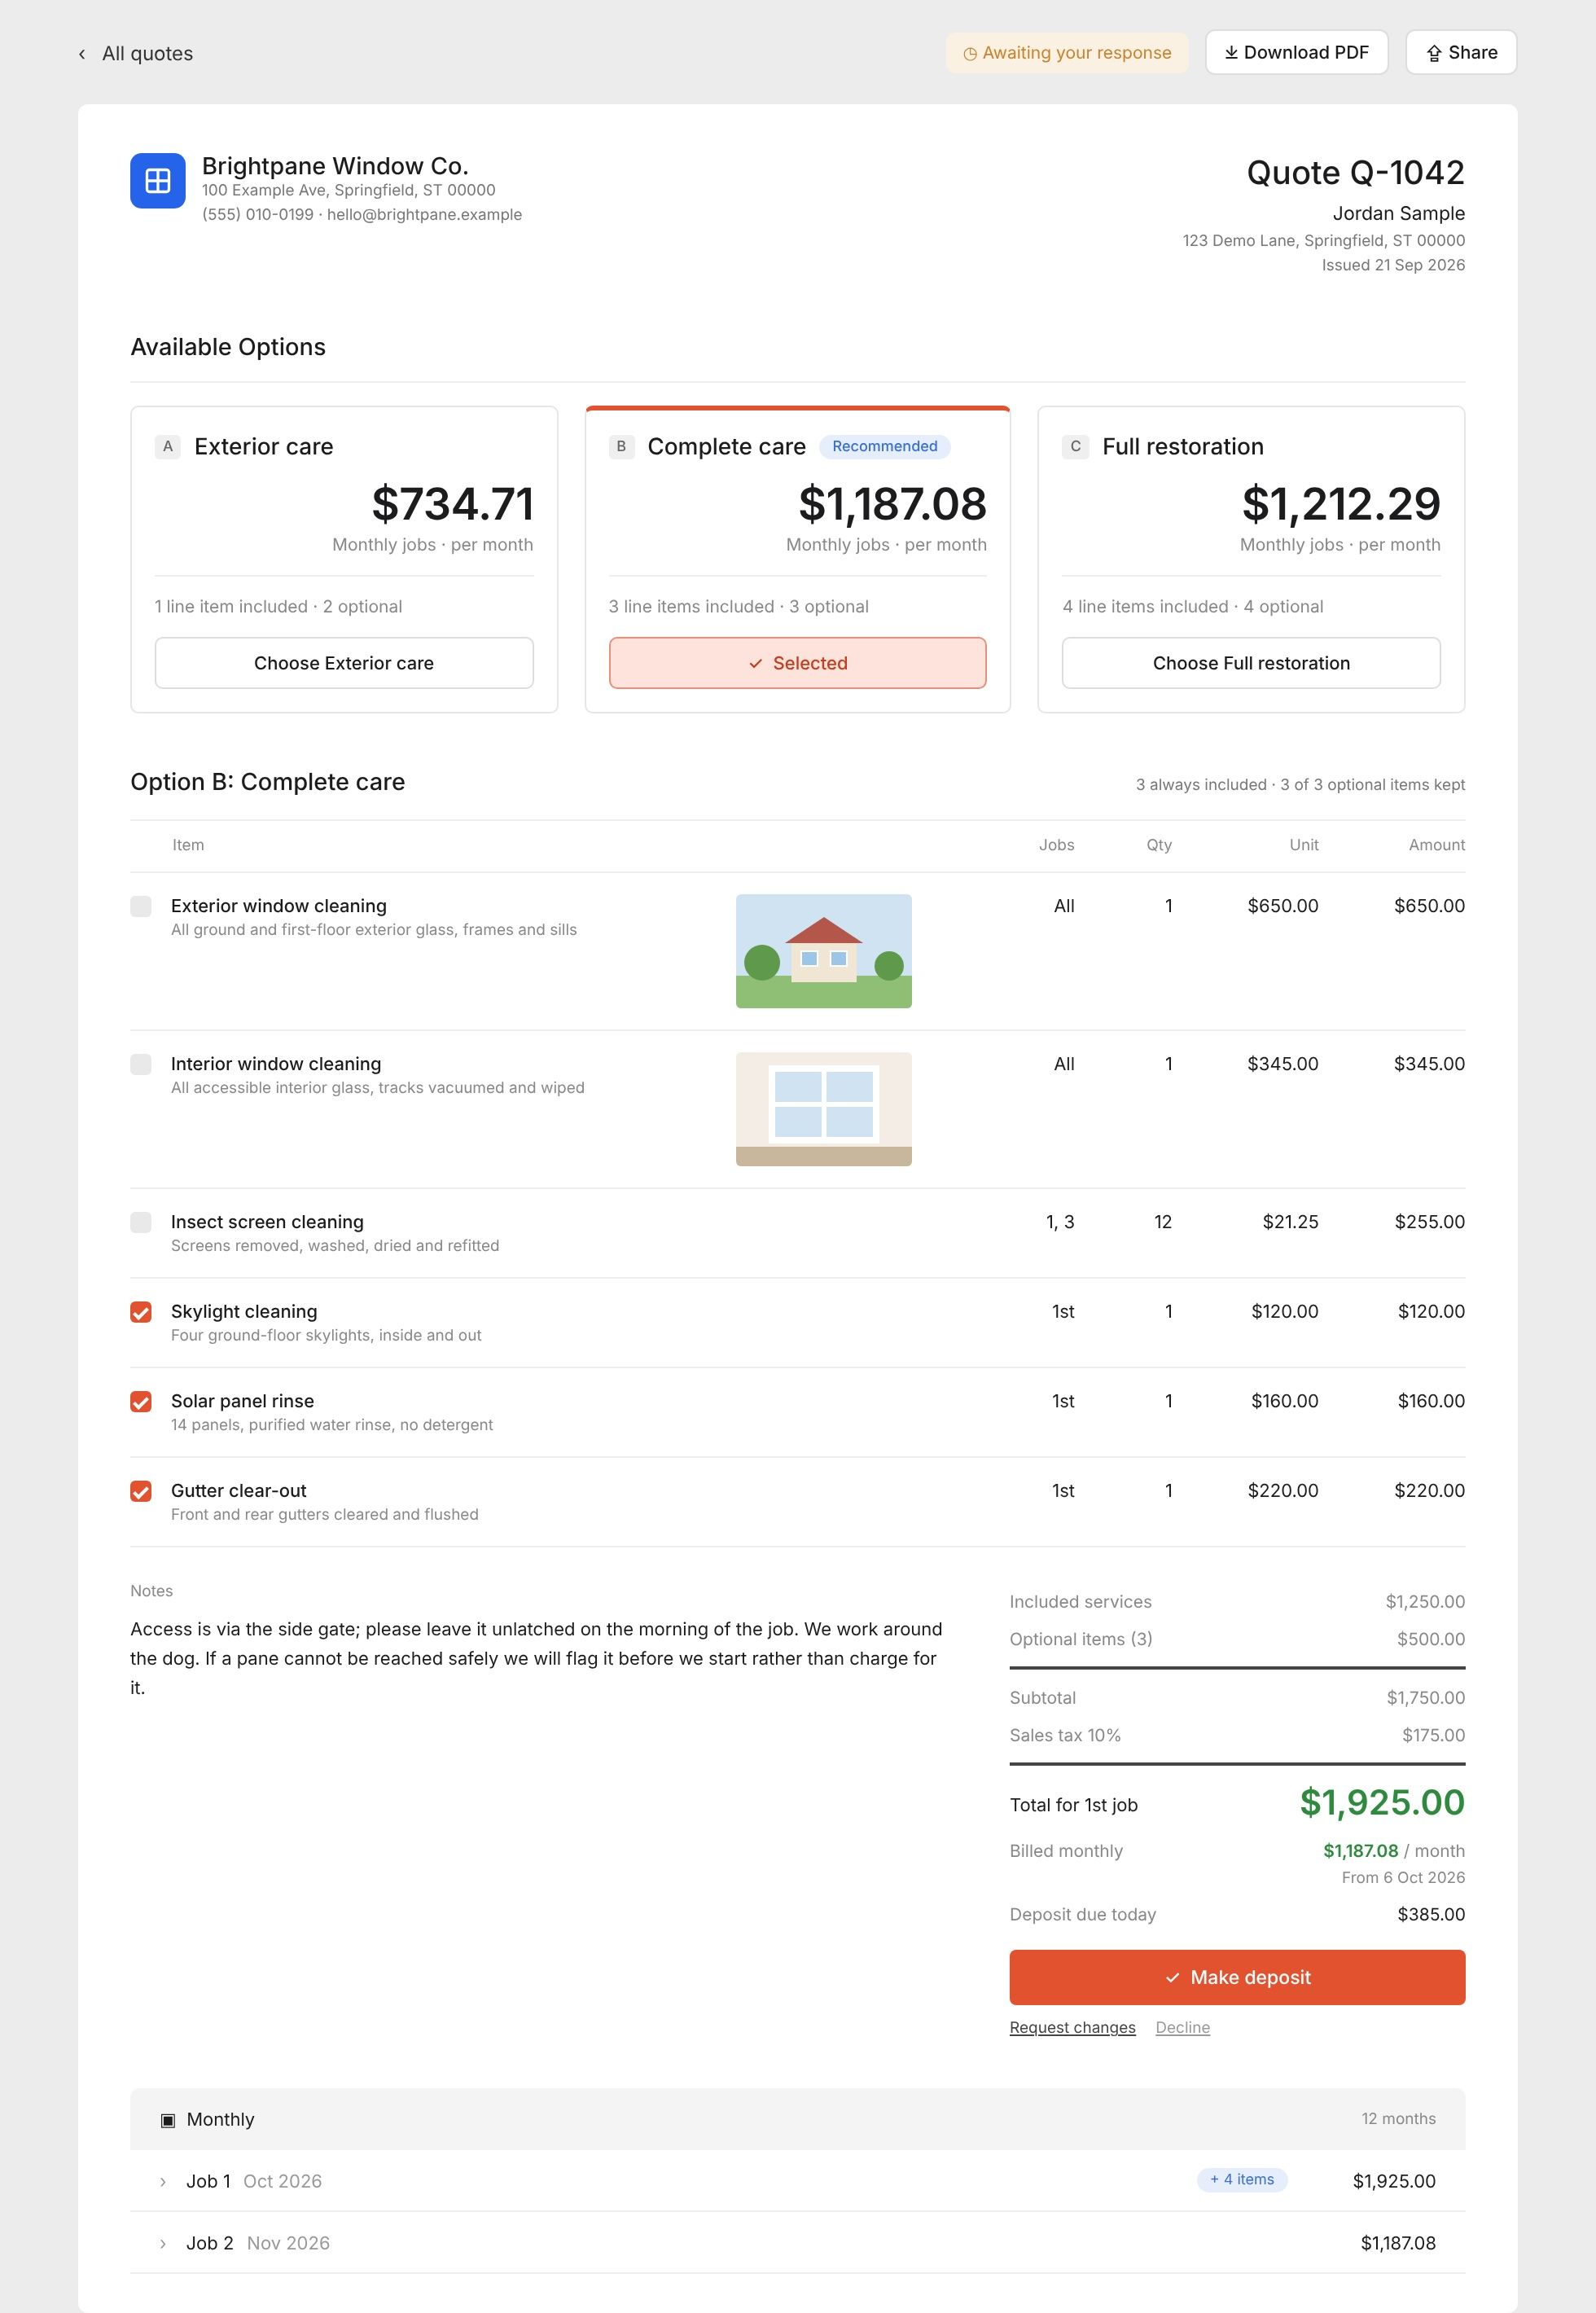
Option cards side by side with price and frequency. If you marked one recommended, it's pre-selected. Otherwise, no option is selected until the customer picks one.
They click Choose [option] to switch. The details below (job breakdown, line items, tax, and total) update to that option.
They keep or remove optional items with the checkboxes.
They click Accept quote, Request changes, or Decline. Accepting shows a confirmation with the chosen option and final price.
After accepting, the quote shows "Accepted on [date] — option [X]" and only the chosen option is displayed. You're notified of every customer action (configurable in Notifications).
After the Customer Accepts
The quote status changes to Approved and the builder locks. At the top you'll see who accepted and which option, plus two buttons:
Convert to service plan — creates the plan from the accepted option only (its items, discounts, frequency, notes, and salesperson). Removed optional items are not included. A lead is converted to a customer.
Duplicate as new quote — copies the quote so you can make changes and resend.
If the accepted option has advance to agreement on, the customer goes straight to sign the agreement after accepting, and the service plan is created automatically once they sign. Without it, the customer has to open the agreement separately, which usually takes longer.
After conversion, the quote status changes to Converted and the new service plan shows on the customer's page. It starts Inactive until you schedule the first service.
Stop Lead Follow-Ups After a Quote Is Approved
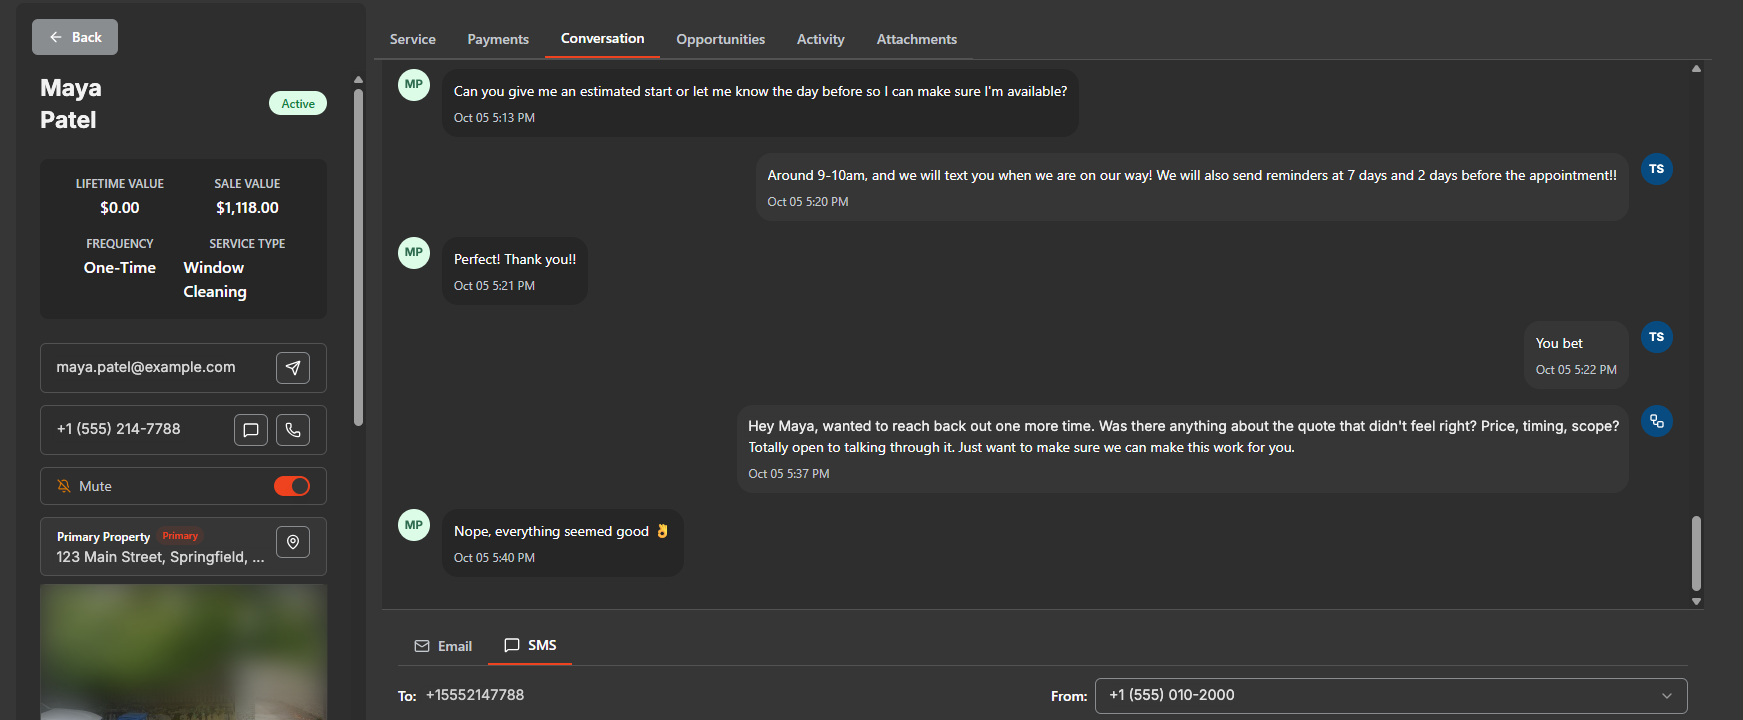
If a lead accepts a quote but stays in a lead stage, lead follow-up automations can keep texting them, even after they're booked.
To prevent this, add a workflow that uses the Quote approved trigger to:
Move the lead to the right lead stage (like Won or Sold)
Move them to the right pipeline stage, if you use pipelines
Once they're out of the follow-up stage, those texts stop. To stop all automated messages for one customer right away, turn on Mute on their profile.
Managing Quotes
Use the quick filters at the top of the quotes list to find what needs attention:
Sent — sent and waiting on the customer
Approved / Not Responded — use this to follow up
Changes Requested — the customer asked for edits
Converted — turned into service plans
Click Export CSV to download the visible quotes for reporting.
Quoting on the Mobile App
The mobile app uses the same quote, options, and conversion flow as the web app.
Start a quote. Go to Customers (or Leads), open the record, swipe to the quotes section, and tap Quote. Confirm you're the salesperson.
Build each option. Add services and line items, discounts, option photos, notes for the client, internal notes, billing, and whether the option advances to agreement. Add more options as needed and mark one recommended if you want it pre-selected.
Send. Choose text and/or email. If the customer has no email on file, send by SMS. You can also copy the link to send it yourself.
View quote as client. Use this to preview exactly what the customer sees. This view has been redesigned to be cleaner and easier to read on a phone, so it works well for walking a customer through options in person.
Convert. Once the status shows Approved, tap Convert to service plan. Review the new plan, adjust scheduling or discounts if needed, and save.
Tips
Three options is the sweet spot. Build your middle tier first, then duplicate it up and down.
Recommend the option you actually want them to pick, since it opens pre-selected. With no recommendation, nothing is pre-selected.
Use plan templates to build recurring quotes faster.
Set Service length on recurring options so the customer sees the full plan term.
Notes are per option, so tailor them to what each option includes.
Use option photos to show the overall job, and line item photos for item-specific details.
Turn on advance to agreement on recurring plan options to get from "yes" to a signed agreement in one step.
Congratulations! You can now build, send, and convert quotes in Rotor.
Have additional questions? Our team is ready to help you succeed. Contact us through the chat or drop us an email at support@getrotor.com.
Related articles
Collect a Deposit on a Quote — require payment to accept
Price Book — set up the line items and plan templates quotes use
Service Plans — what an accepted option becomes
Deposits on Invoices — invoice deposit path when you skip quote deposits
Was this helpful?
Still need help? Ask the team